Shop Settings
Shop Settings
You can set the shop settings from the global configuration.
Shop Name: The name of your shop. You can enter the name of your shop You want to create.
Shop Logo: Upload image to be used as shop logo. You can upload the shop logo upto max 1GB.
-
Back-office logo: Upload image to be used as Sellacious back office logo. You can upload the back-office logo upto max 1GB. It is a premium feature.
-
Back-office Logo Icon: Upload image to be used as Sellacious back office logo icom. You can upload the back-office logo icon upto max 1GB. It is a premium feature.
-
Back-office Favicon: Upload image to be used as Sellacious back office logo. You can upload the back-office logo upto max 1GB. It is a premium feature.
Shop Address: The address of your shop. You can add the 3-4 lines of the address here in the text box.
Shop Country: The country belongs to your shop. You can select the country after typing two or more characters the list of the countries are to be listed here.
User IP Based Default Country: It will overwrite shop country in address. If we set as ‘yes’ then you can access the country with the User IP. If we set as ‘No’ Then you can’t access the country with the User IP.
Shop Phone Number: The phone number of the shop can be added here.Two fields are there to add the shop phone #1 and shop phone#2. Shop phone#1 is for adding personal phone number and shop phone#2 is for adding alternative phone number.
Shop Email: The email id of the shop can be added here.
Shop Website: You can add the website of the shop here. It must be in a complete website address for example: www.sellacious.com/shop
Shop Currency: Choose default shop currency. You can change the shop currency from here according to your choice.when you click on the text box drop box menu will be appeared all the currencies are to be listed here.
Currency Denotation: Choose how the currency should denoted globaly:
- Symbol ($)
- 3 Letter Code (USD)
Order Complete Redirect: Enter the URL where the user should be redirected on click of continue button on order completion page. You can add the URL of the redirected page of the order. It must be in the complete URL like https://www.google.com
Display Stock on Product Detail: If you select Yes, product stock count will display on product detail page.
Display Stock on Product in product list view: If you select Yes, product stock count will display on product list page.
Zero Price Checkout: Choose whether an item with zero price can be purchased(for free) during the checkout or not.
Allow User Currency Prefernece: Allow users to set their own preferred currency.They can always to another currency temporarily during site navigation. If you click on the Yes button then you can allow the user currency preference and if you click No then you can’t allow the user currency preference.
Detect Currency From IP: Automatically detect currency from users IP address if no preferred currency is set. If you want to enable the currency from your Ip then click on yes button and if you want to disable the currency from your IP then click on No button.
Catalogue Mode: If enabled, the user will be allowed to checkout and place orders. In frontend there is a option while the placing the orders. When you click on the check out the payment process starts and allow the checkout process. If you want to allow the checkout then click on the ‘yes’ button otherwise you can click on ‘No’ button.
Minimum Cart Value: Enter the minimum cart value required to be able to complete the checkout process. You can add the minimum amount of value for processing the checkout according to the currency.
Global Checkout Form Fields: These fields will be automatically added in cart checkout. Fields which are not set as Global will be available for selection in Checkout Form Fields.
Checkout Form Fields: If you want to ask some extra information from a buyer during the checkout process. Add your form fields here. The cart checkout will include these automatically.
Checkout Type: Select if you want Checkout page to show in steps-wise or in one page.
OPC column count: If you select one page checkout in above checkout-type then select, how many columns should the One page checkout sections be divided: 2 columns, 3 columns.
Disable Guest Checkout: Whether to disable checkout for guest users.
Order Status Change: Choose whether you want to change order status for the whole order or for each product individually.
Allow Order Address Edit: If you want the customers to be able to edit billing/shipping address before payment, enable the setting from here.
Allow Buyers to Delete Items From Unpaid Order: This option allows buyers to delete items from order fail page.
NOTE: If there is only one item in the order, it cannot be deleted.
.png "Screenshot%20%2818%29")
Product Unique Fields:
Option to set core fields as unique for products is provided here product sku, manufacturer sku and any used barcode can be set globaly unique, when set from here those filelds in product edit behave unique for each product.
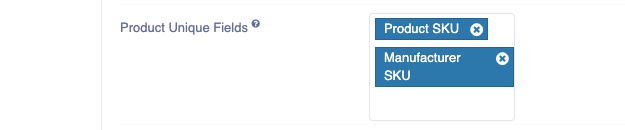
NOTE: Any product attribute can also be made as an unique field. To know more about it go to https://www.sellacious.com/learn/additional-attributes/unique-product-attribute
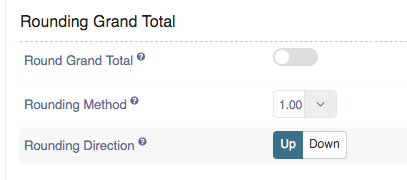
Rounding Grand Total
Rounding Grand Total: If enabled, Cart Grand Total will be rounded according to the below settings.
Rounding Method: Choose the Rounding Method which will used to round Grand Total.
Rounding Direction: Choose whether Grand Total should be rounded up or rounded down.
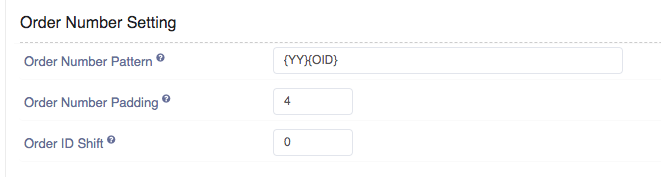
ORDER NUMBER SETTING
Order Number Pattern: Choose a pattern for how the order numbers are built when an order is placed. You can use following placeholders in your pattern.

Order Number Padding: Enter the minimum number of digits to use for order id when building order number.
Order ID shift: Enter the value by which the order ID should be increased when building order number.
Invoice Setting:
Invoice on Order Status: Select the order status on which the Invoice should be generated. Leave it as is, if you want the Invoice generated as soon as the order is created.

Invoice Date Format: Here we can choose date format which we want to print on invoices.

Invoice Number Pattern: Here we can choose invoice number pattern which we want to print on invoices.
Invoice Number Padding: Enter the minimum number of digits to use for invoice id when building invoice number.
Invoice ID Shift: Enter the value by which the Invoice ID should be increased when building invoice number.
Invoice Filename Pattern: Here we can choose invoice filename pattern which we want to print on invoices.
RMA
RMA is the return merchandise authorisation is a part of the process of returning a product to receive refund, replacement or repair during the product’s warranty period.
Allow Returns: Choose how to manage purchase returns for a product sold from this store. You can choose three conditions from here disable, Use global settings, allow sellers to choose. You can set as the disable, Use global settings and allow sellers to choose. In disable you can disable the allow return option. Global settings will set the allow returns option from the global configuration. In allow sellers to choose, sellers can choose whether to allow the return or not.
Return Period & Image: Enter number of days to allow returns and choose an image for each to show on the product page to highlight the return availability.The seller's(if allowed) may be provided a choice among these while listing their products.
Terms & conditions for returns: Enter the terms and conditions which are applicable to all return requests. You can describe all the conditions if you apply the allow return option.
Allow Exchanges: Choose how to manage purchase exchanges for a product sold from this store. You can choose three conditions from here disable, Use global settings, allow sellers to choose. You can set as the disable, Use global settings and allow sellers to choose. In disable you can disable the allow return option. Global settings will set the allow returns option from the global configuration. In allow sellers to choose, sellers can choose whether to allow the return or not.
Exchange period & Image: Enter number of days to allow exchange and choose an image for each to show on the product page to highlight the exchange availability.The sellers may be provided a choice among these while listing their products.
Terms & conditions for exchange: Enter the terms and conditions which are applicable to all exchange requests. You can describe all the conditions if you apply the allow exchange option
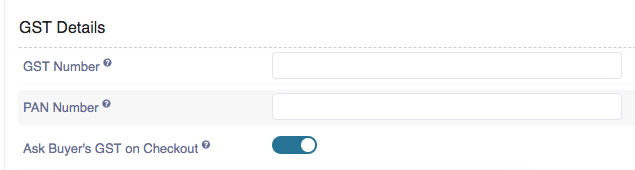
GST Details
GST Number: You can enter your shop GST Number here.
PAN Number: You can enter your shop PAN Numbere here.
Ask Buyer's GST on Checkout: If you enable this, You can ask Buyer GST Numbere here during checkout.