Stripe Connect
Written by : Indresh Maurya
Date : 10-08-2021
Compatibility : Sellacious v2.0.0-rc5+
Index
Introduction
Installation
Stripe Account add Branding
Creating Payment Method
Seller Express Onboarding
Introduction
Stripe Connect is a full-stack solution for using Stripe’s capabilities on behalf of others. Connect provides a powerful API and other tools you need to make charges, as well as onboard, verify, and pay sellers, contractors, service providers: whomever business’s users are.
With the help of this plugin, the purchase amount directly goes to the seller's Stripe Connect account.
To configure the Stripe connect plugin, you need to install and enable the plugin in your site. You can download the plugin from https://www.sellacious.com/p/sellacious-extensions/payment-plugins/stripe-connect.
Installation
To install this plugin go to the Joomla administrator > Extensions. Now go to Manage and Install. Select upload the package option, install the package you downloaded.
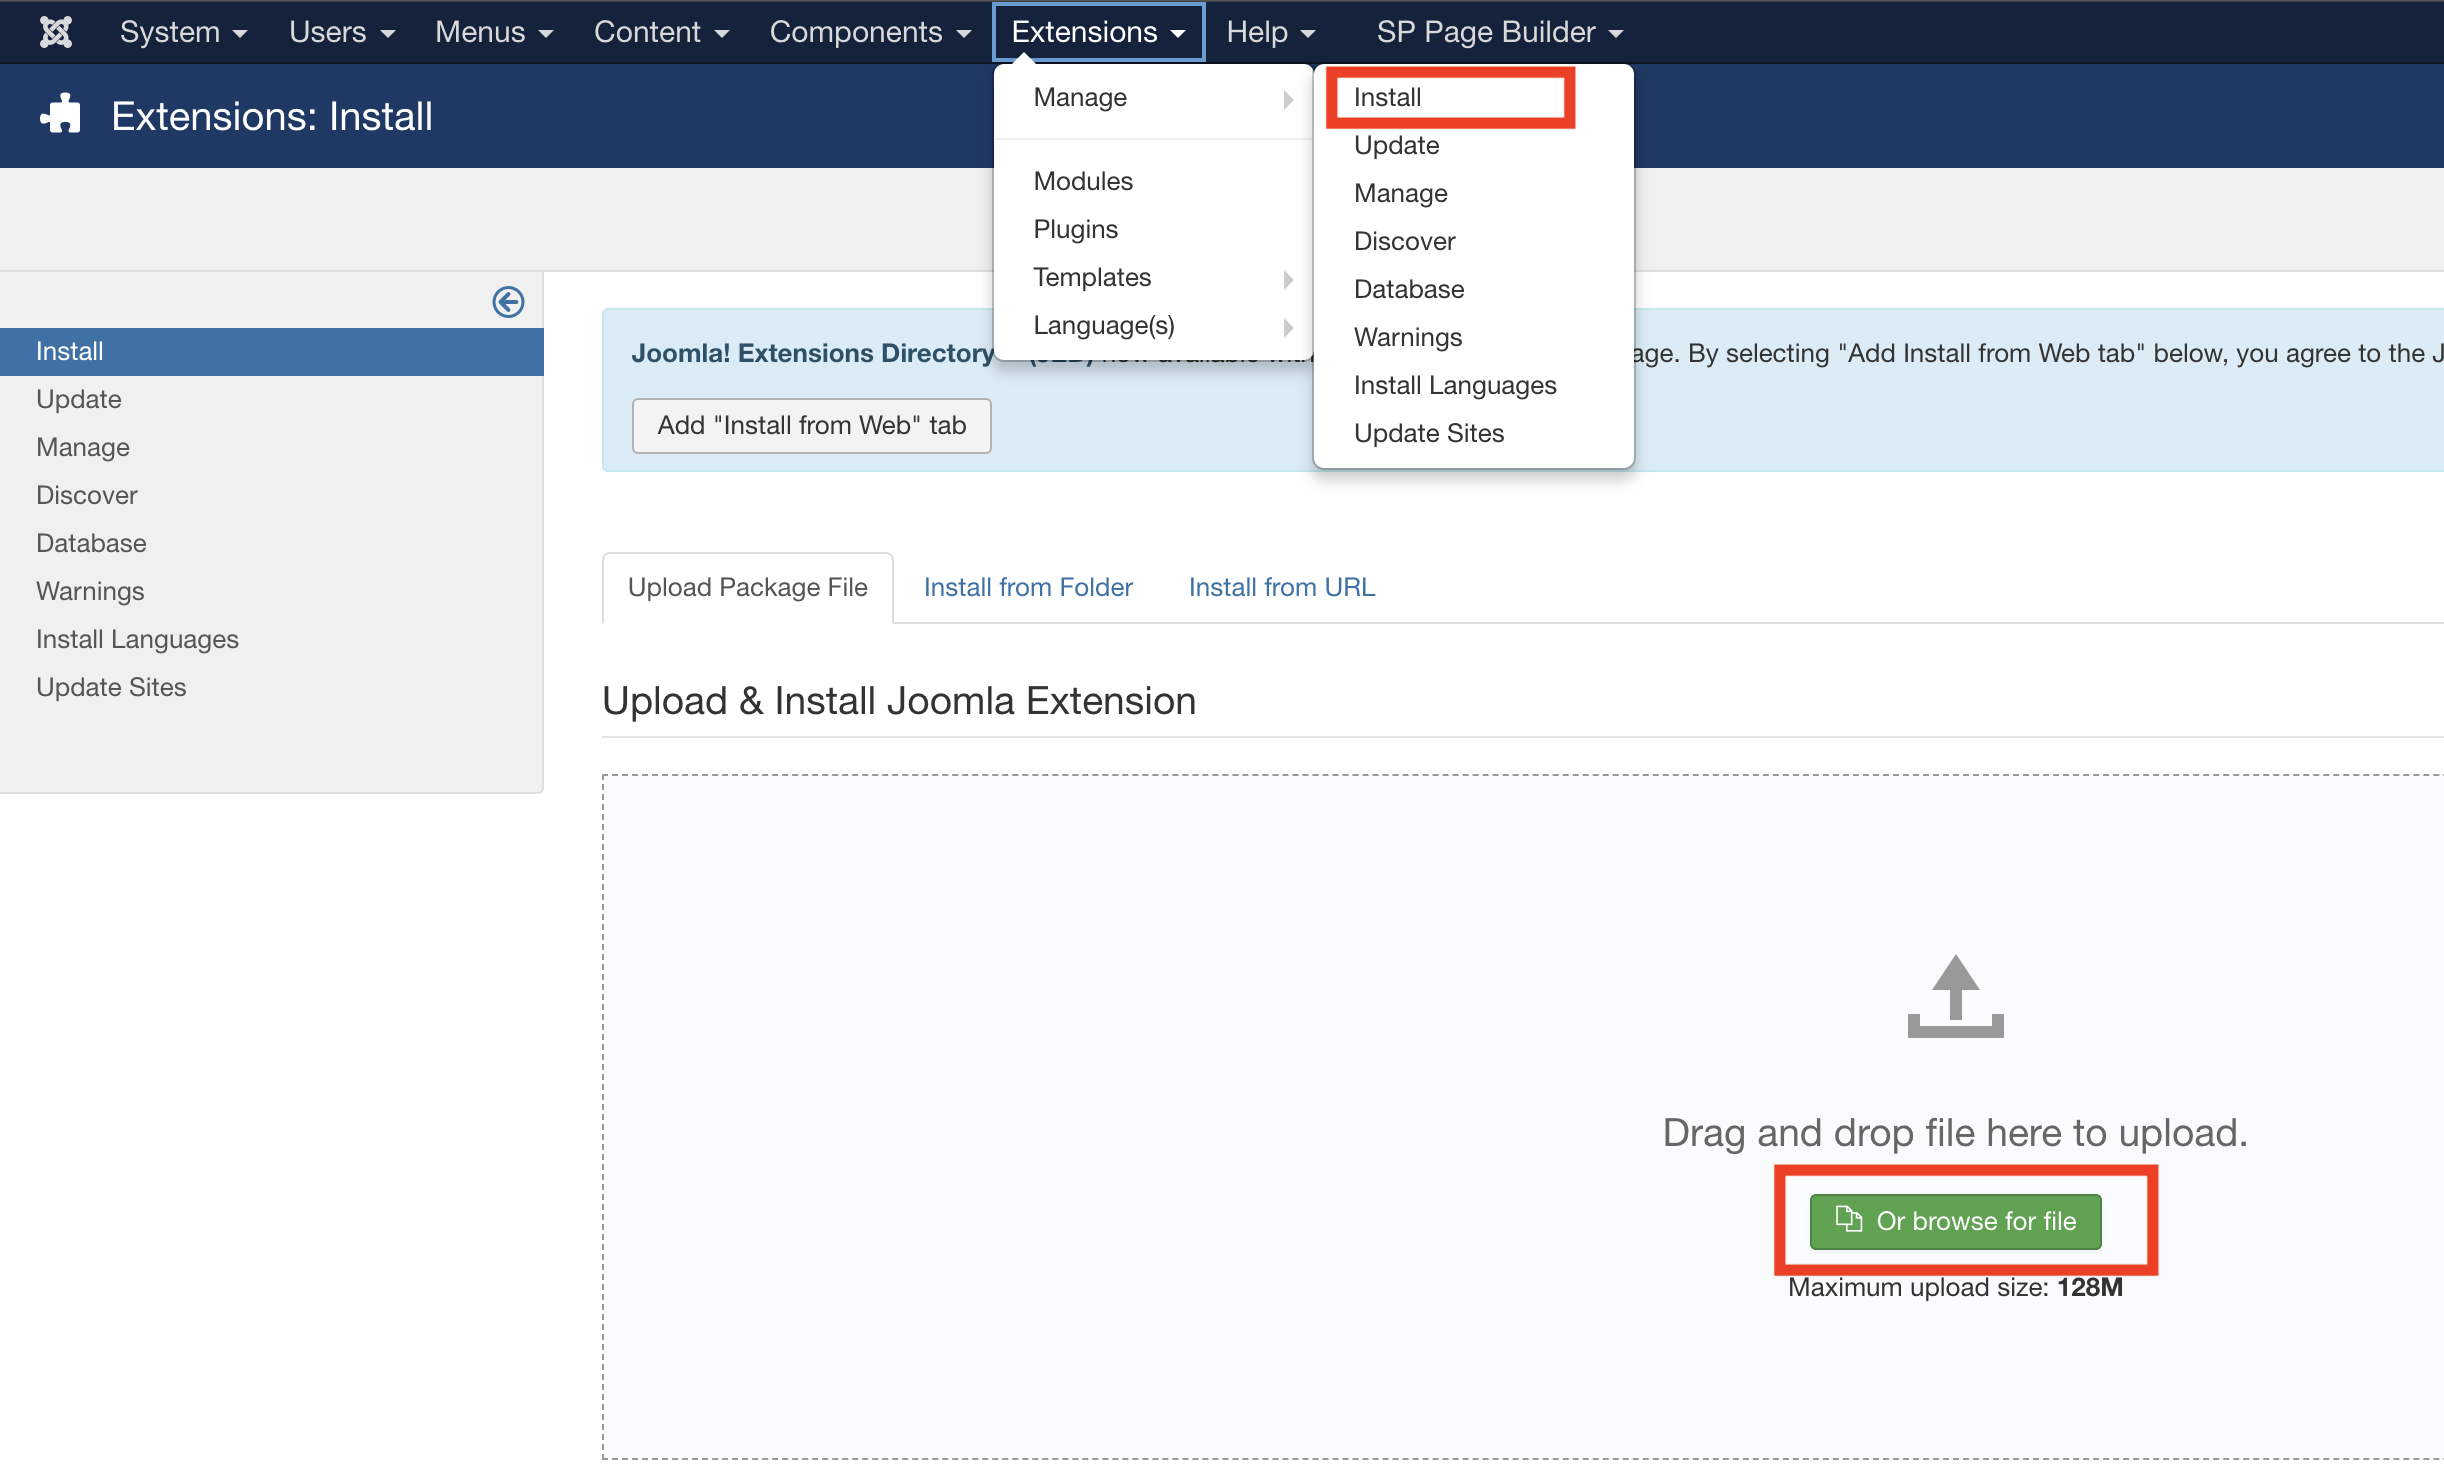
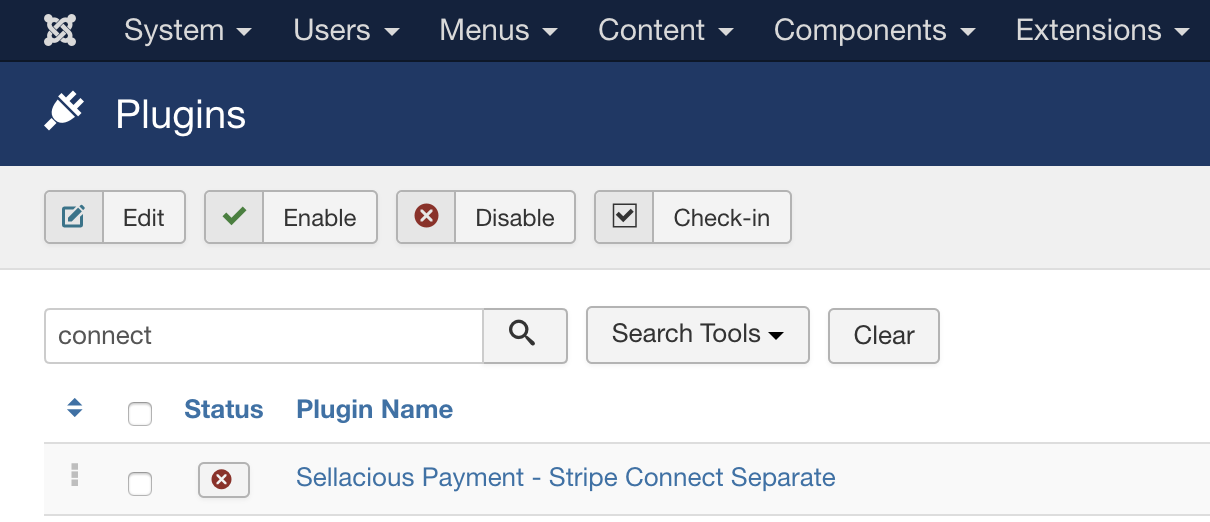
You can enable the plugin from Joomla Administrator > Extensions > Plugins. Search for this plugin and enable it by clicking red cross icon.
Stripe Account Branding and Webhook Confuguration
Before proceeding further go to your stripe account dashboard, create an account and configure your branding like busuness name and icon etc. You can find it here https://dashboard.stripe.com/test/settings/connect .
Note down your Publishable Key and Secret Key from here https://dashboard.stripe.com/test/apikeys
Save the webhook url for account and connect webhooks here https://dashboard.stripe.com/test/webhooks
the webhook url will be https://your-website.com/index.php?option=com_stripeconnect&task=webhook.event
Note down the generated Webhook secret for both by clicking on the saved webhooks
Choose manual payouts at Payout Settings from here https://dashboard.stripe.com/settings/payouts
Creating Payment Method
Now, to configure this payment method go to Sellacious backend > Settings > Payment Methods. Click on New.
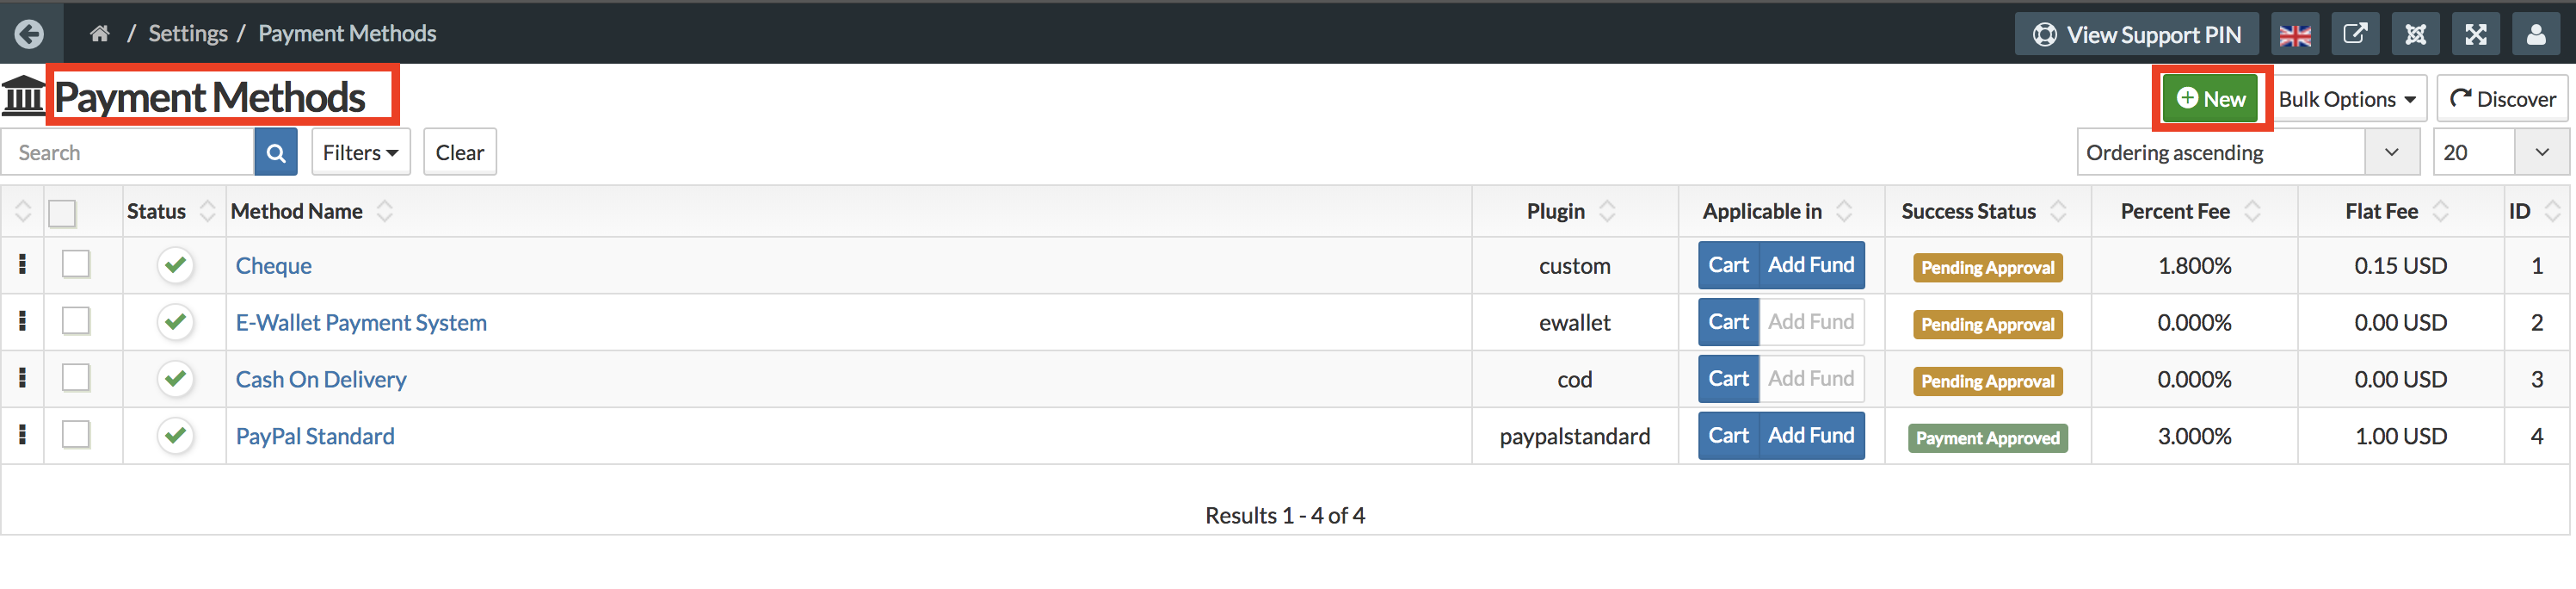
Select the Plugin Stripe Connect Separate Charges and Transfers as the payment api for this payment method

In Stripe connect tab click in configure on configure stripe button.

In the configuration drawer save Publishable Key, Secret Key, Account Webhook Secret and Connect Webhook Secret which you have noted down earlier.

Here you can also set how you want to transfer and payout the funds when payment is done.

Seller Express Onboarding
Once the payment method is configured sellers can be onboarded in express account by going to their profile page. Sellers will get Payment Settngs in their backend edit profile view.


Sellers can choose a country supported by stripe while onboarding

By clicking on connect with stripe sellers can make express account and onboard with platform.

Once the onboarding process is complete sellers can login into their express account from here

When payment is received on sellers product it will show up in this view

Admin can see transfers made to sellers in stripe transfers view
/sellacious/index.php?option=com_stripeconnect&view=transfers

To know more about express accounts goto https://stripe.com/docs/connect/express-accounts